How To Format Your Audio Files For ACX Using Adobe Audition
Sep 07, 2021
In this article, I show you a step-by-step guide on how to format your audio files to ACX standards so you can publish them on ACX and Audible using Adobe Audition.
Since Amazon and Audible have close to the monopoly on audiobooks, it is important that we know how to format our audio files after we record the audiobook so we can upload them to ACX.
Now, ACX is a company owned by Audible that brings together authors and producers with narrators and voice-over artists.
The goal is to allow everyone the chance to publish their works without having to go through a large publishing house. KDP (Kindle Direct Publishing) allows writers/authors to publish their books on Kindle and ACX allows writers/authors to publish their audiobooks on Audible.
With all of this freedom to self-publish, ACX needed to create a standard for audio files in order to keep the level of sound and quality high. So they implemented a set of standards for audio files to be followed when uploading to ACX.
This guide will walk you through those steps, with pictures, so you will know what to do when you are uploading your files for publication.
Step 1: Start Here When You Are Finished Recording
After you have finished recording your audio files and have edited them, it is now time to format for ACX.
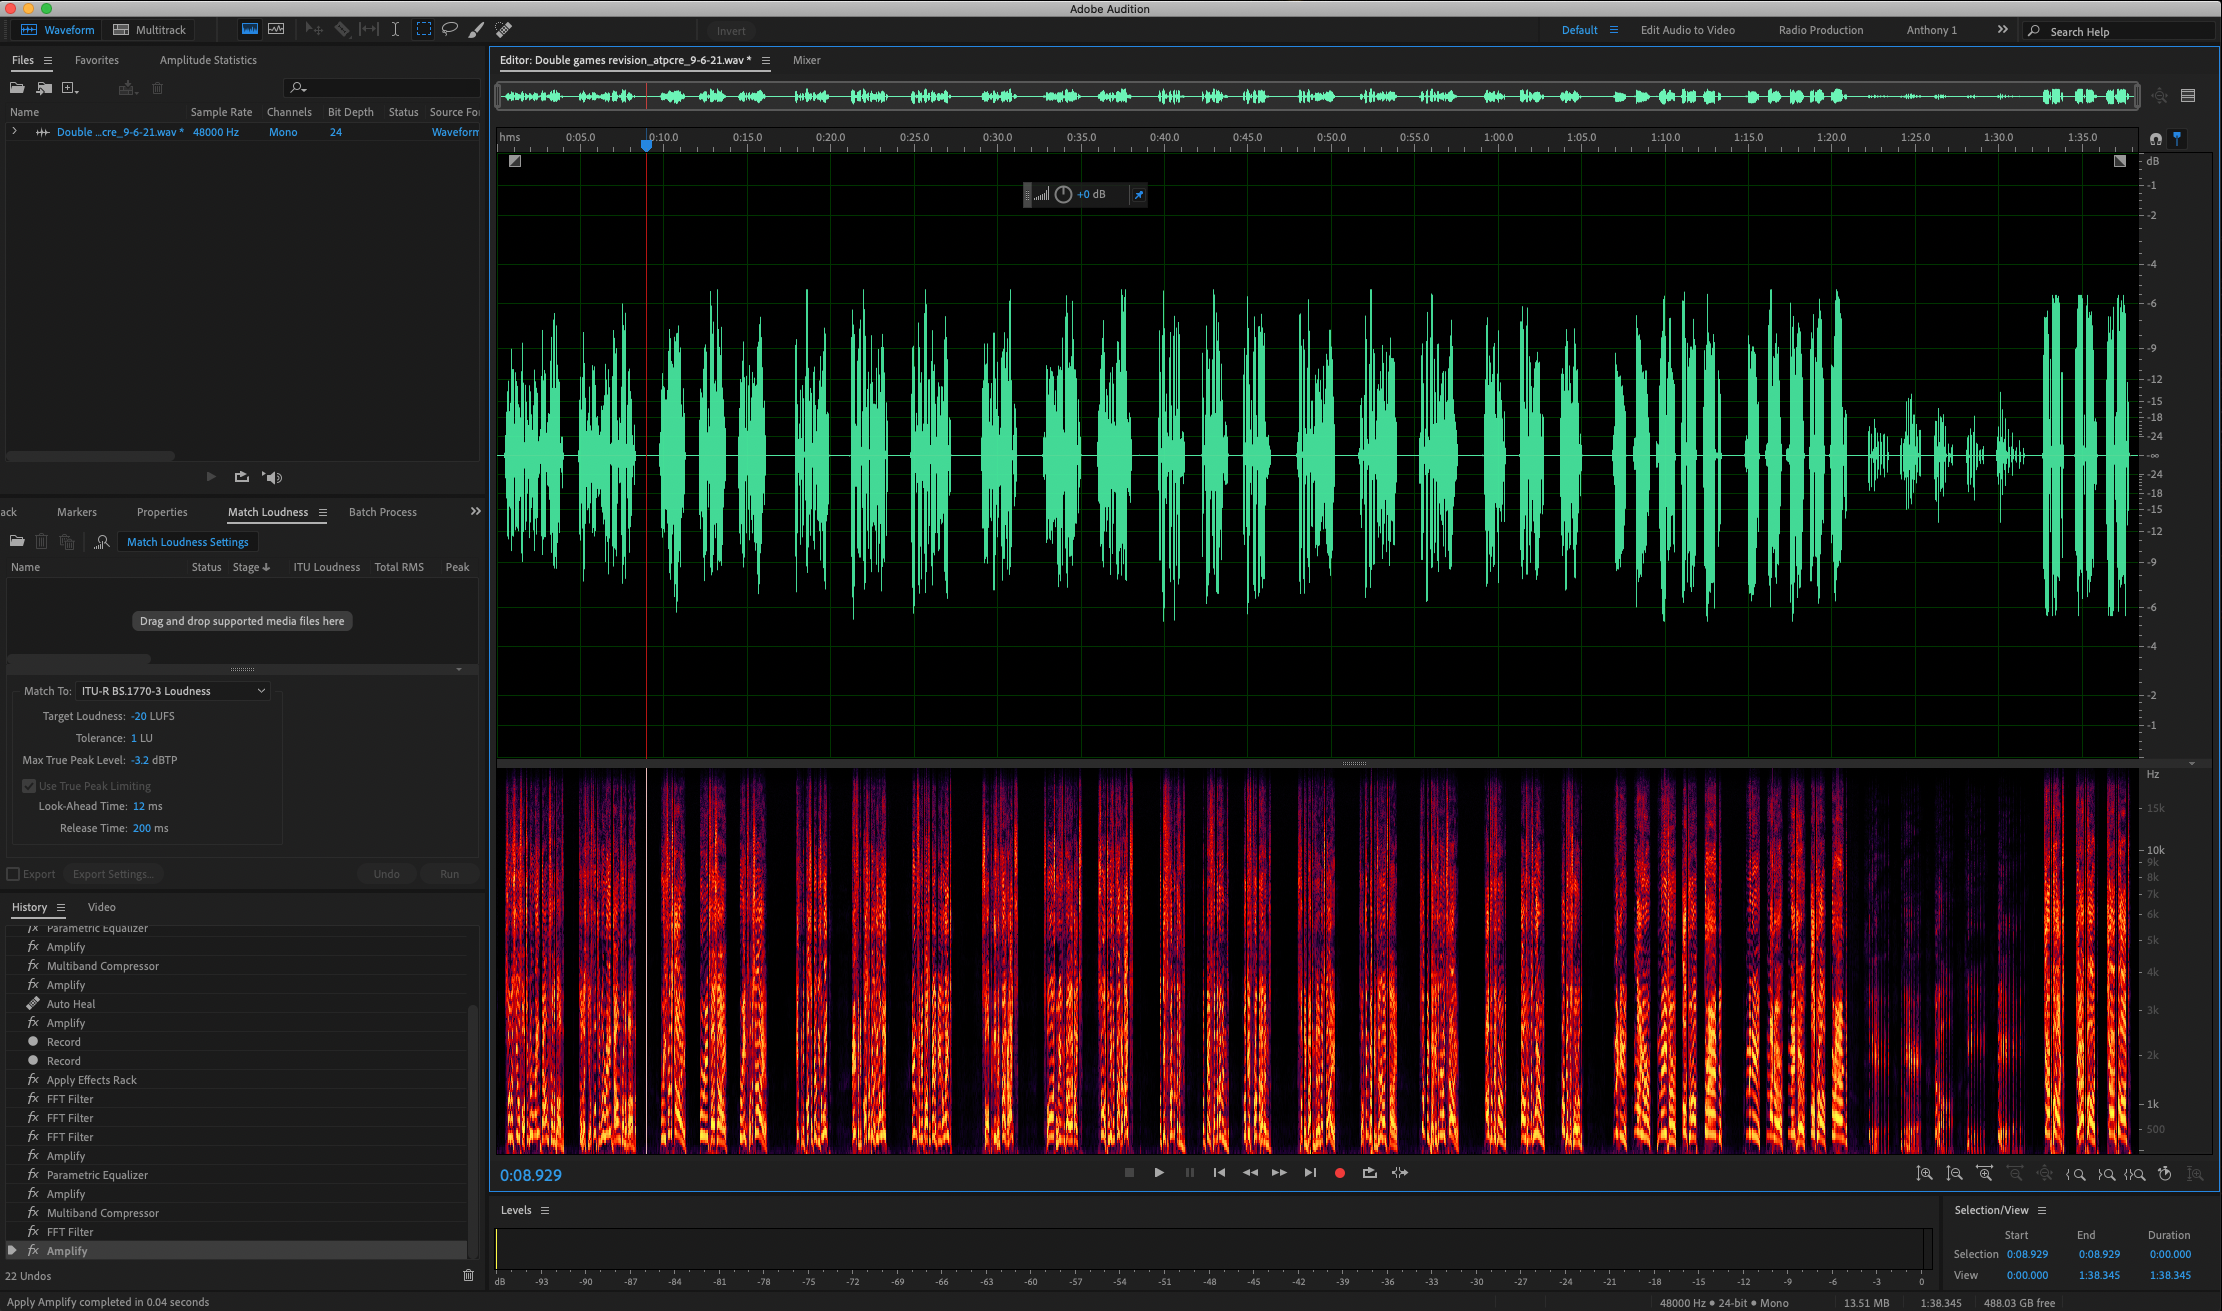
In the picture below, I have shown you the starting screen from where to begin to format. If your screen doesn't look exactly like this, that is okay. Just follow along from the next pictures.
Step 2: Find The Loudness Tab
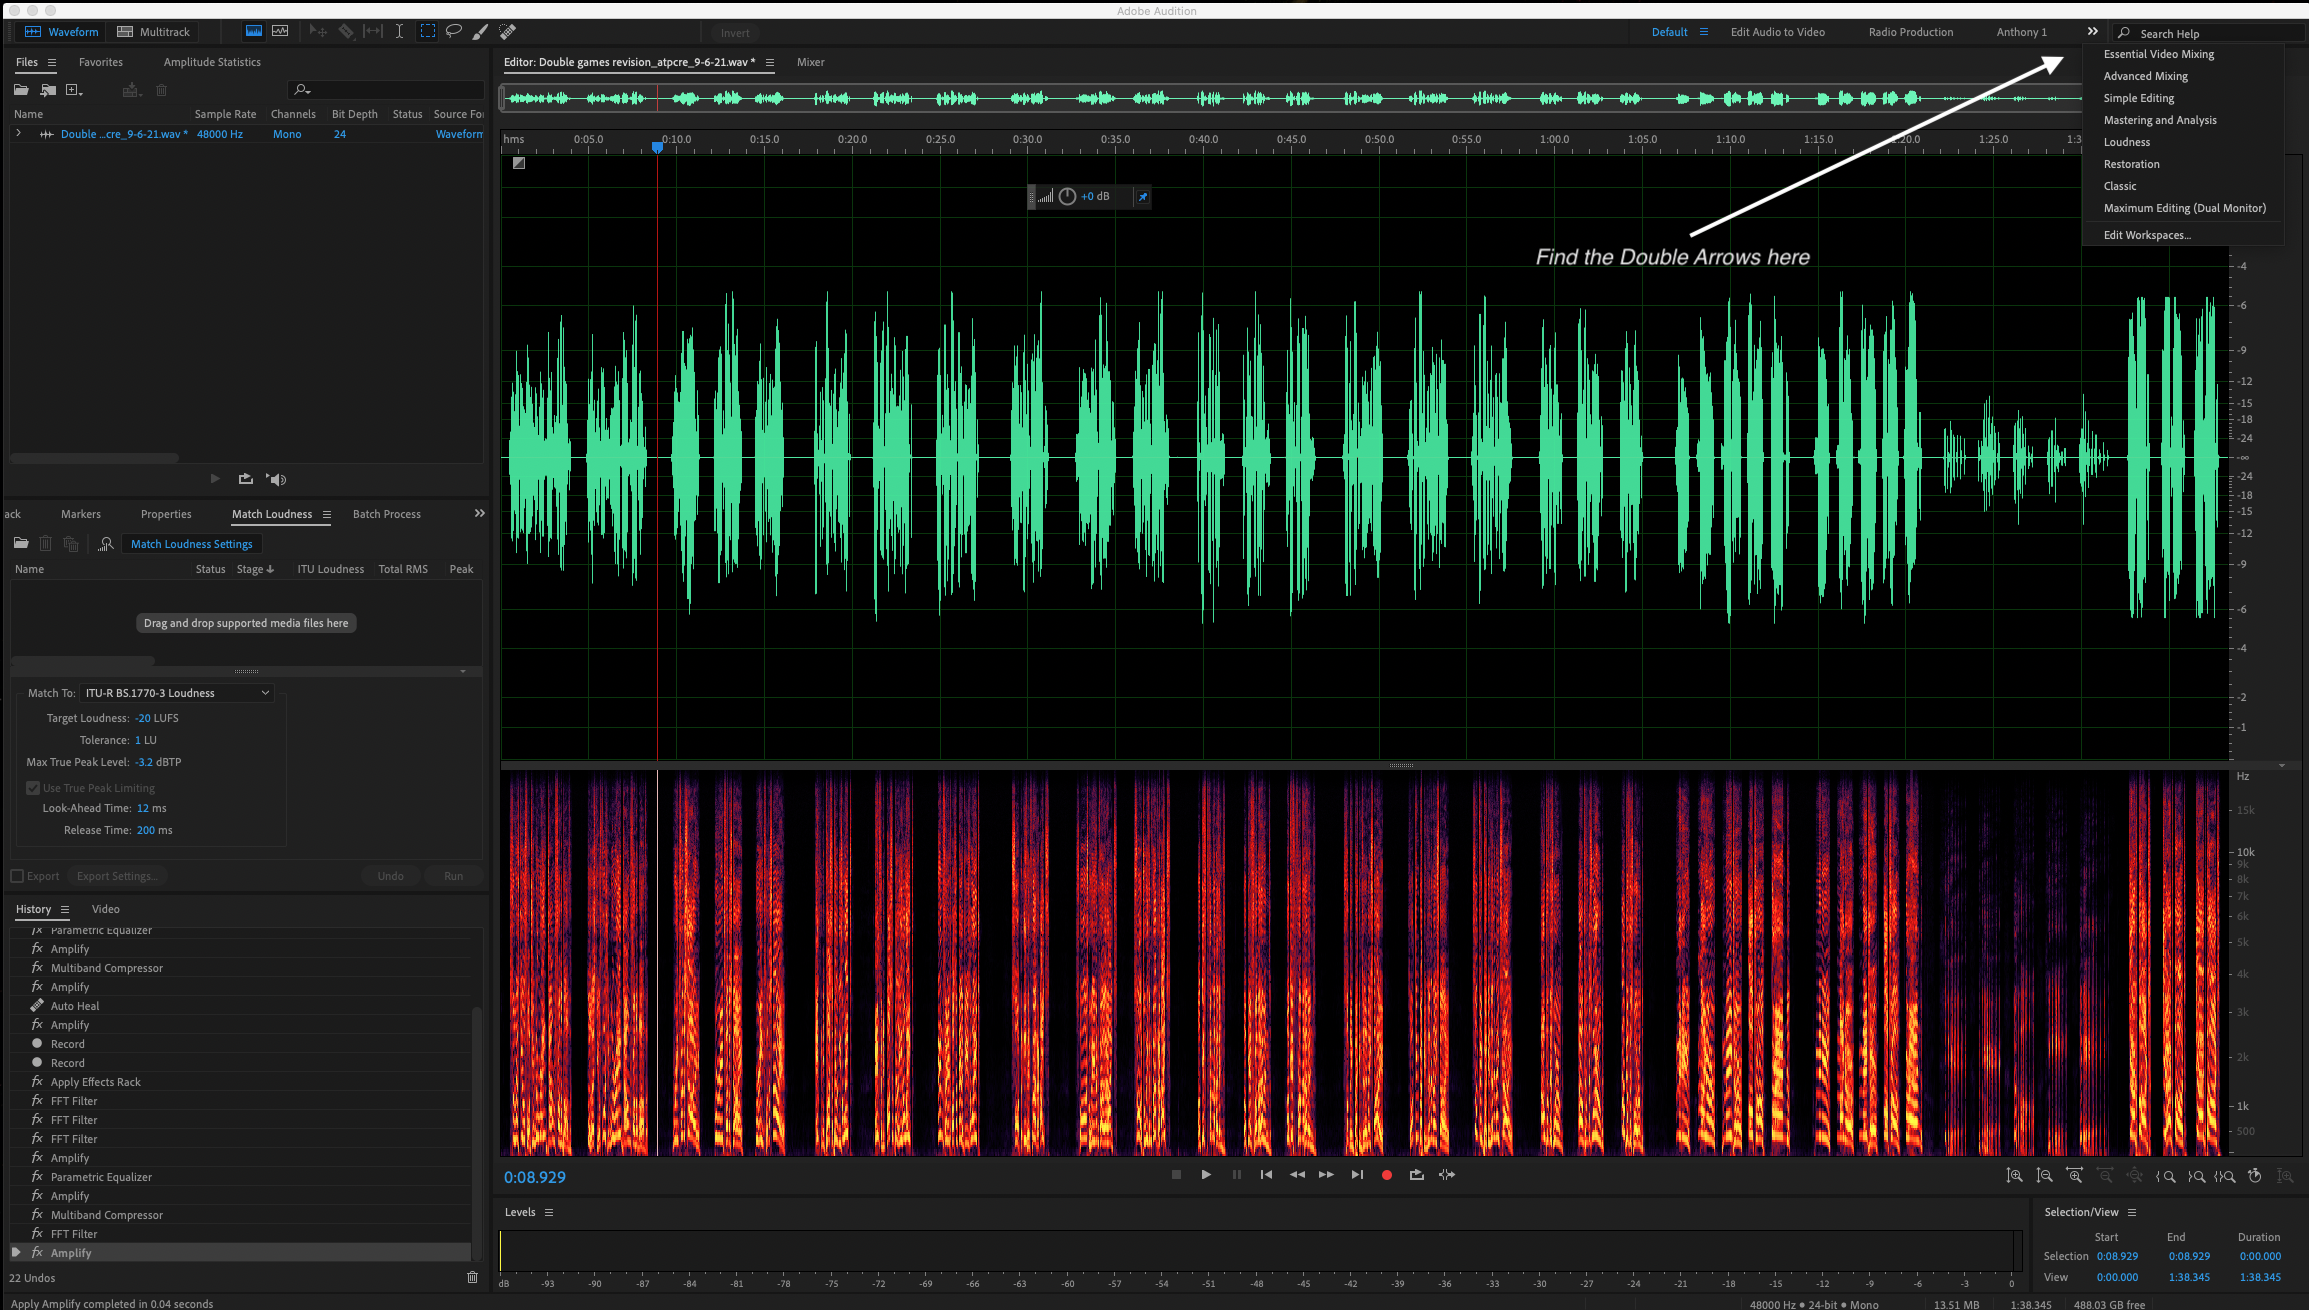
In the upper right-hand corner of Adobe Audition, you will see double arrows pointing to the right.
Go there and click on them.
You can see the double arrows here and what happens when you click on them:
Step 3: Find Loudness In The Tab And Click It
It doesn't matter where loudness shows up under the tab, click on it and it will take you to the next part of the process.
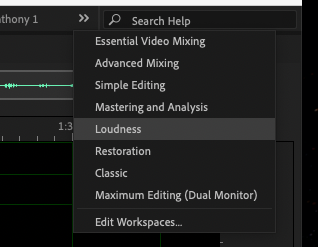
Clicking on Loudness will now take us to another screen in Adobe Audition that will allow us to automatically program Audition to set the files correctly.
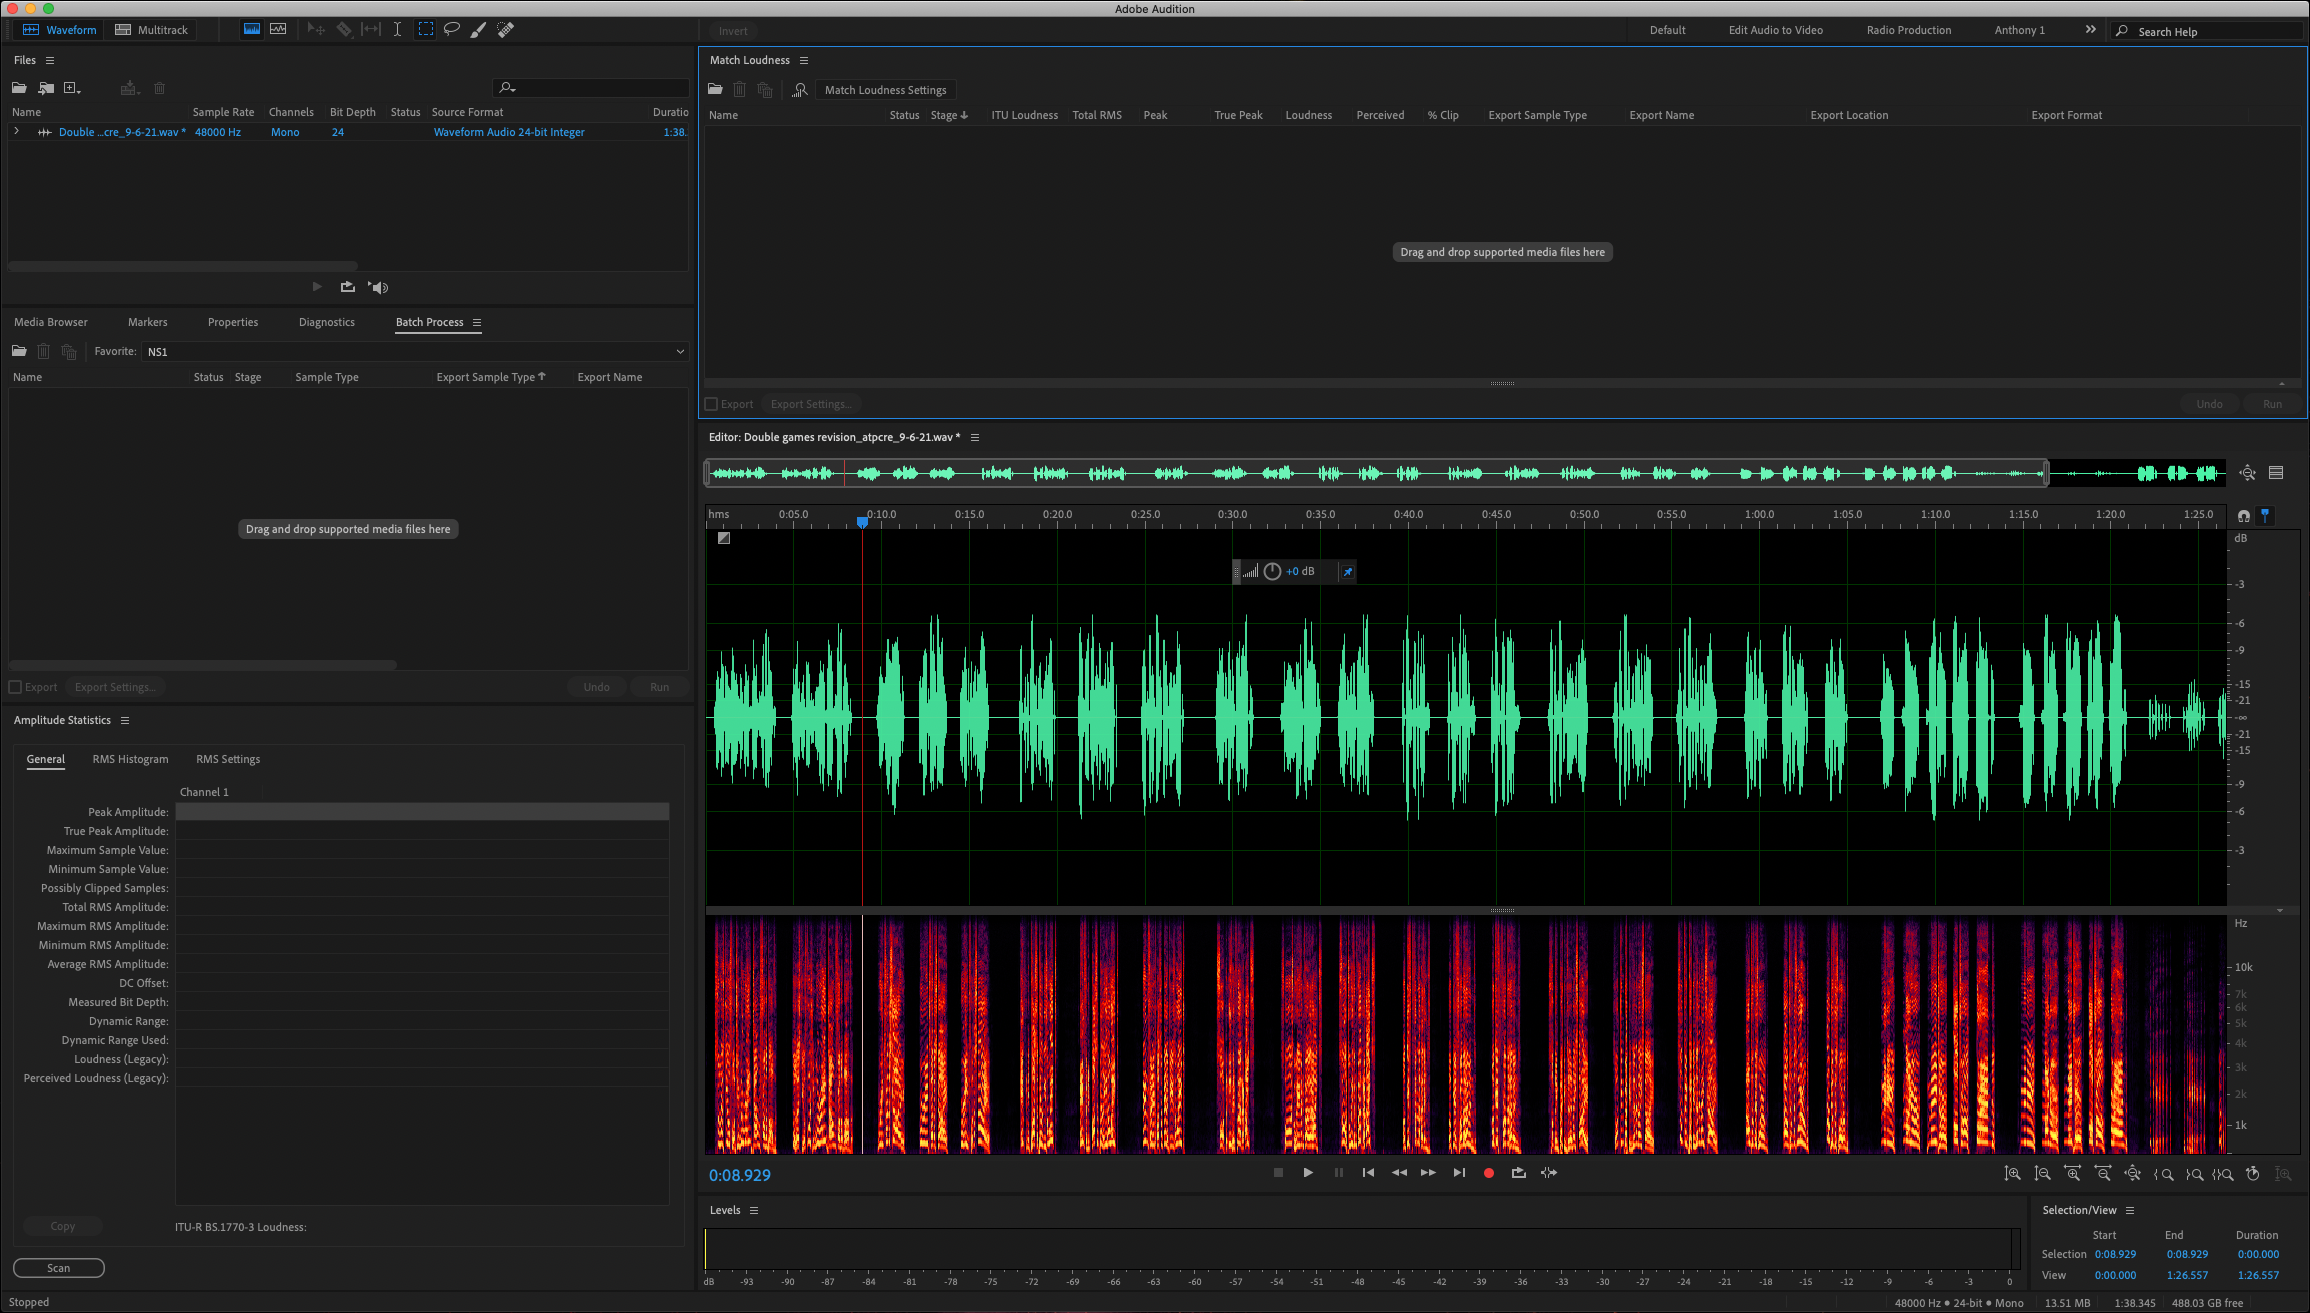
Step 4: Your Loudness Screen Should Look Like This
After you have found and clicked on "Loudness", your screen should look like this. If it does not, just go back and repeat the process to bring you here again and it will work.
Now that we are here for the first time, we have to set the parameters.
Step 5: Set The Parameters For Formatting To ACX Standards
The first thing we have to do is find and click on the "Match Loudness Settings" as shown below in the picture. This will bring up another tab that will allow us to program Adobe correctly for the formatting.
On a side note: Once you do this, it automatically saves and you should not have to do this again.
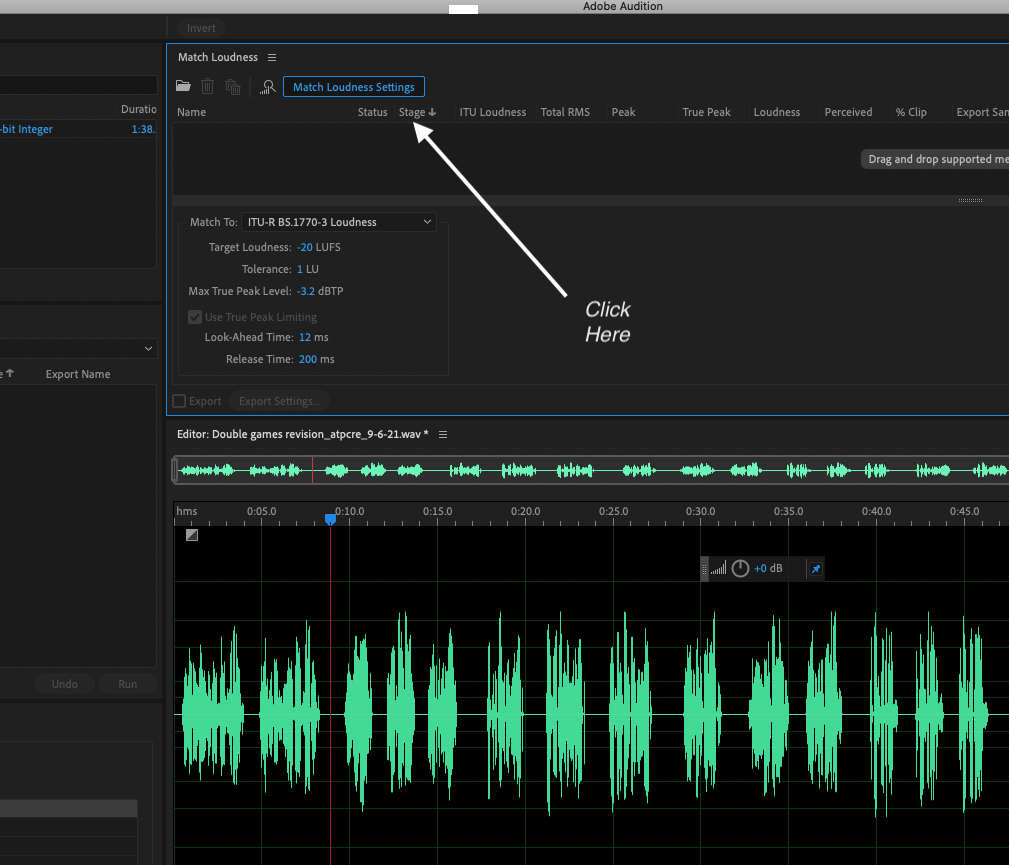
Once you have found the "Match Loudness Settings", click on it and it should bring up a dropdown below it that is titled: "MATCH TO".
Click on "Match To"
Step 6: Click On ITU-R Loudness
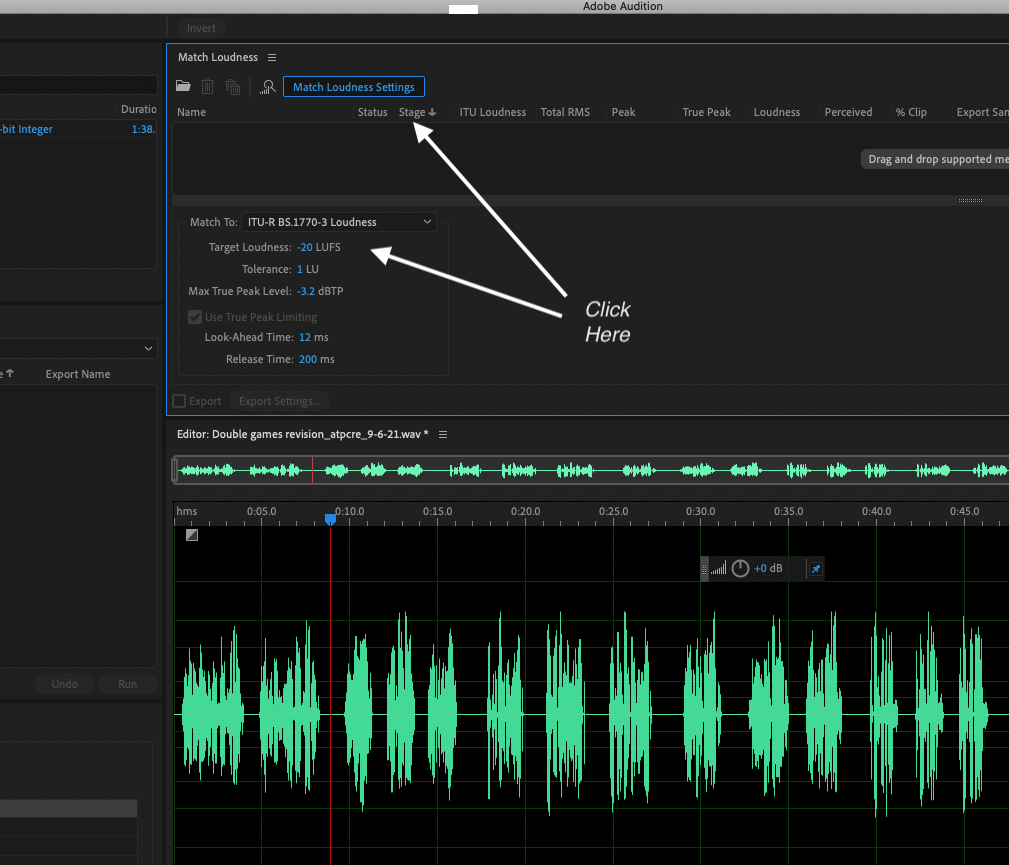
Once you click on the ITU-R Loudness tab under "Match To", you will see "Target Loudness" in the form of LUFS (Loudness Unit Full Scale) or the maximum level a system can handle.
We want to set this between -18 db and -22 db. I have chosen -20 db as the middle of the road. I find that if you set it towards the middle of these parameters, you won't be affected by a little nudge in volume in either direction.
The next setting to pay attention to is the "Max True Peak Level" or the loudest point in your signal. We want to set this at -3.2 db.
ACX requires no more than -3 db, but I have found that when you go to save a file, it can sometimes save a little higher, like - 2.9 db or -2.8 db. So with -3.2 db, you don't have to worry about it.
All of the rest of these settings are left alone. You don't need to do anything else with them.
Step 7: Move File And Hit The Run Tab
After you have completed the settings, move the file over to the "Match Loudness" box and hit the run tab.
You can simply move the file over by dragging and dropping. Look at the picture below to get an idea of how it should look.

Once you have moved the file over and hit the run tab, you are ready to check and see the results.
Step 8: Check Amplitude Statistics For Correct Settings
In this step, you are going to head down to the lower-left corner of your screen and hit the button, SCAN SELECTION.
This will bring up a series of numbers. The only ones we are interested in are "Peak Amplitude" and "Total RMS Amplitude".
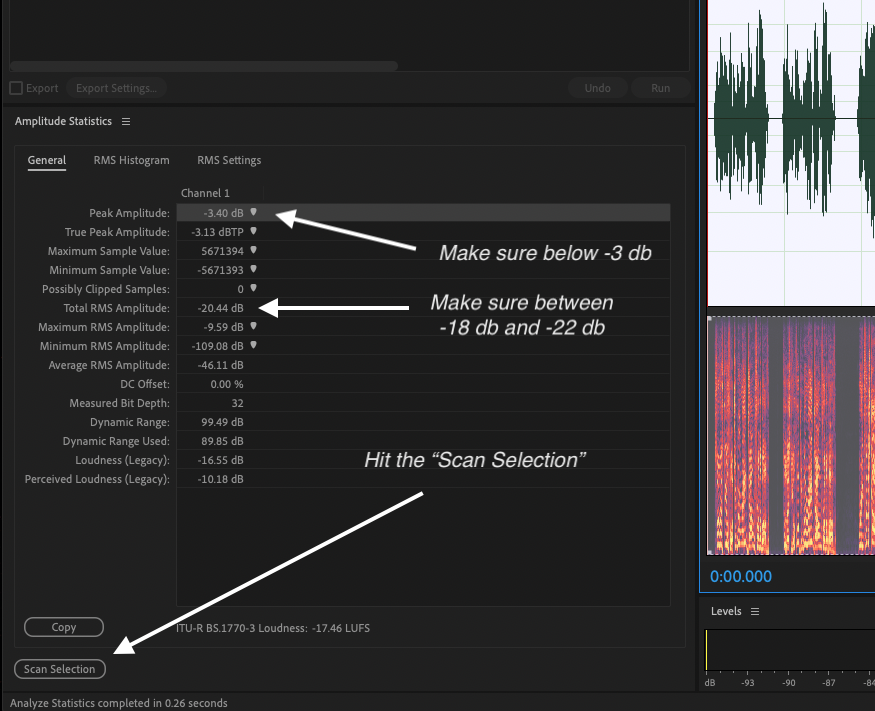
The "Peak Amplitude" should not be below -3 db and the "Total RMS Amplitude" should be between -18 db and -20 db.
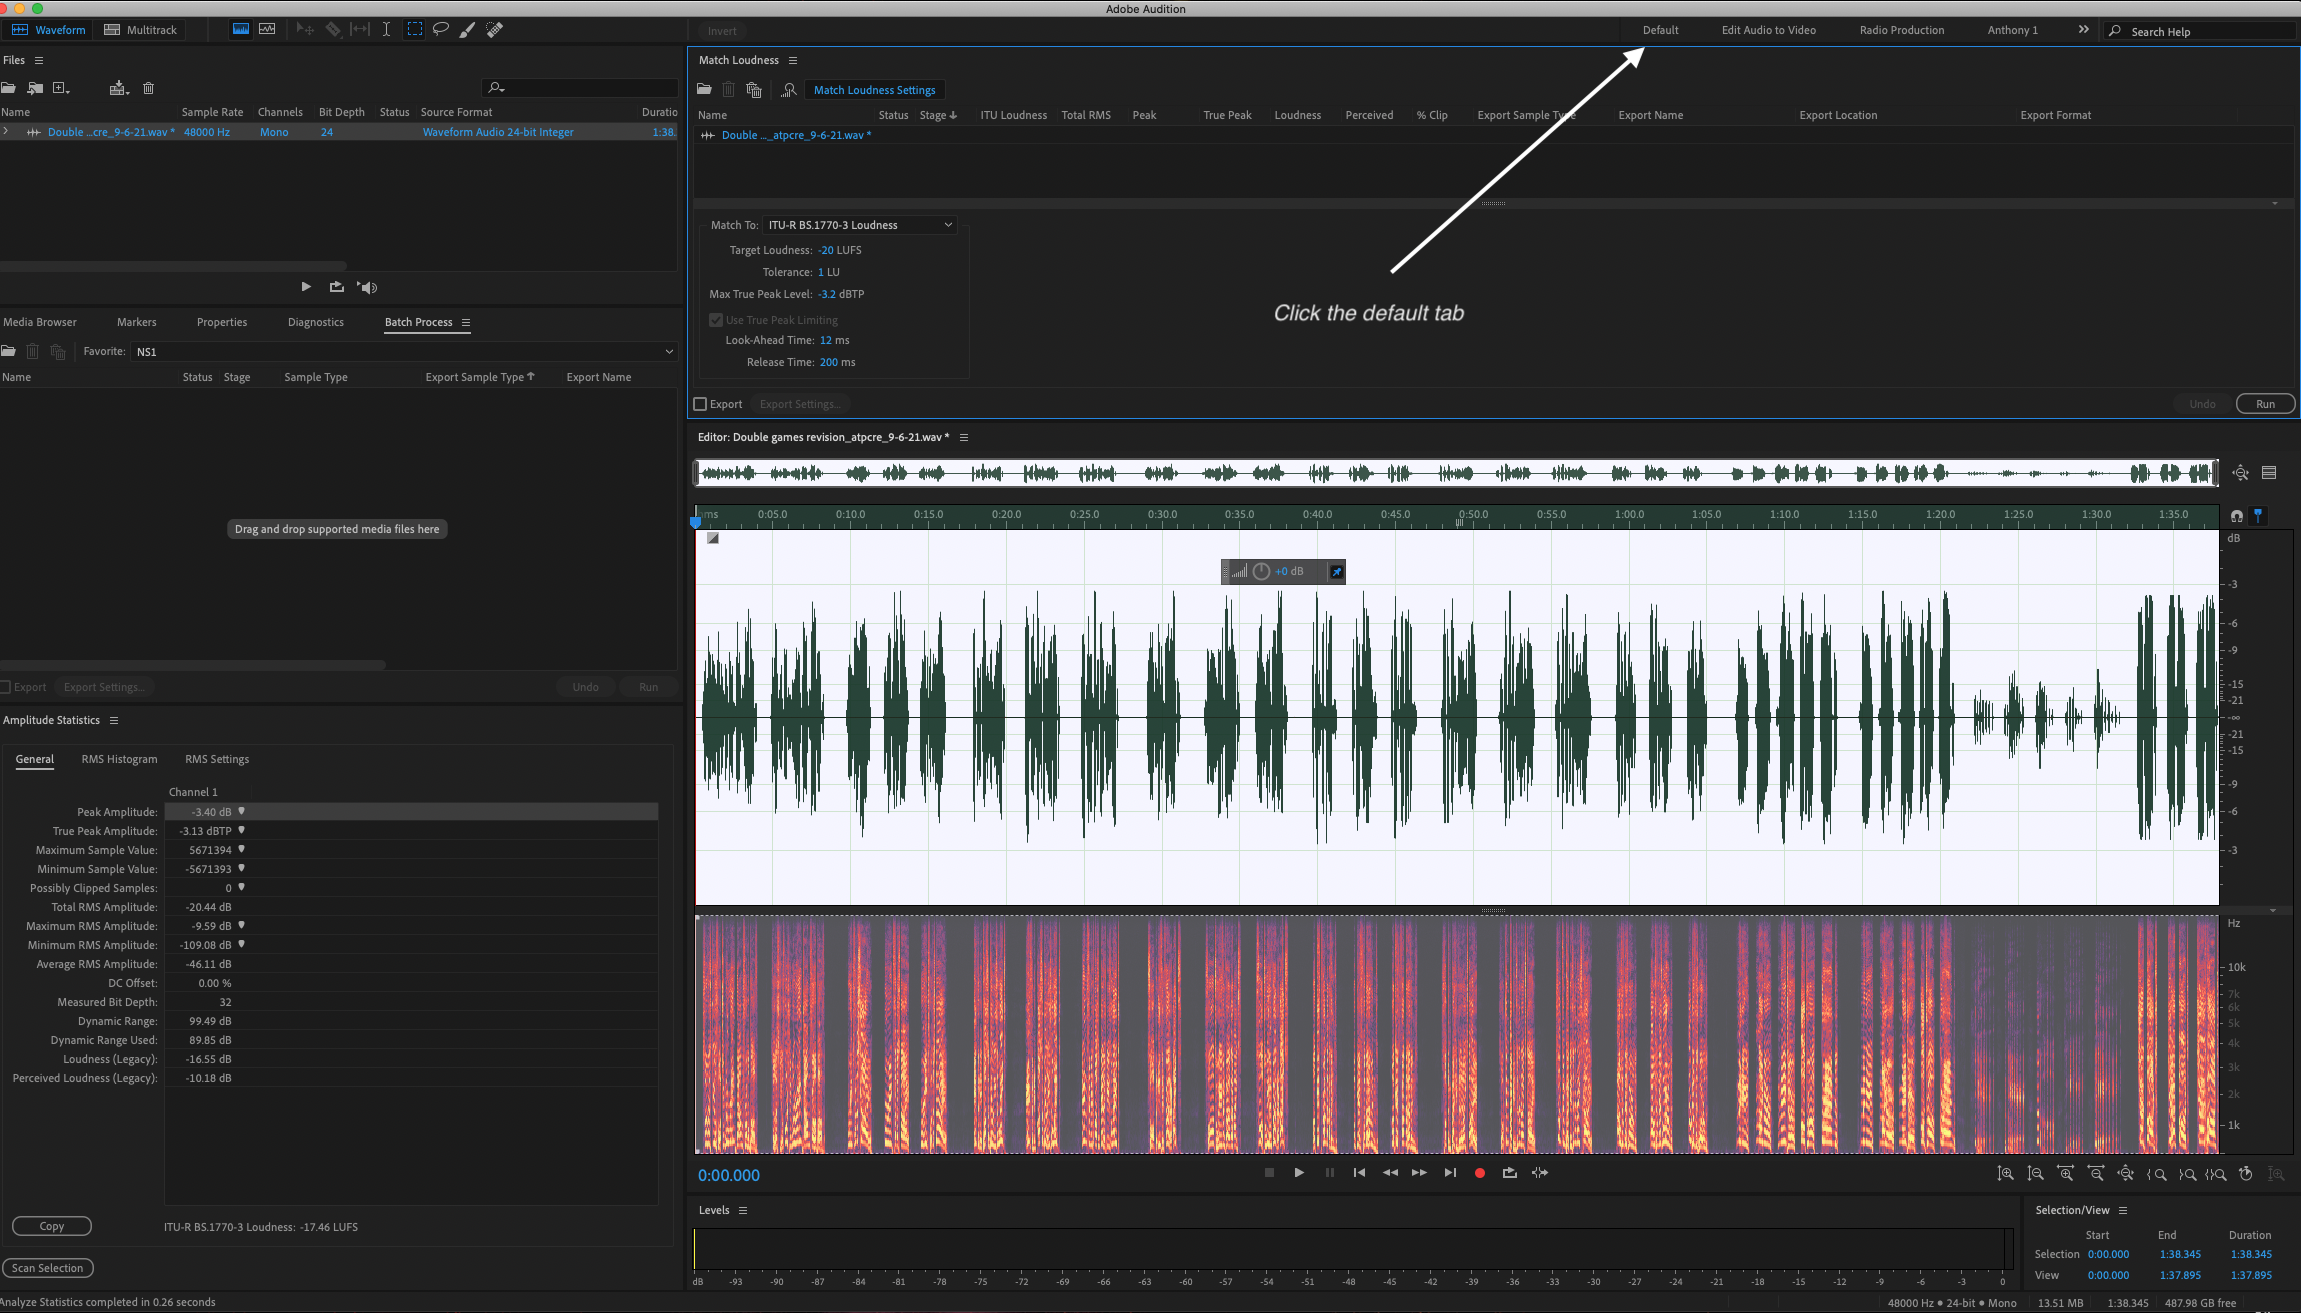
Step 9: Click On The Default Button To Move Back To General Screen
On this step, you want to click on the default tab so you can move back to the general screen.
This way, we can move onto the next step of making sure there is enough space in the front and end of the file before saving.
After you make it back to the general screen, we only have 2 more steps to take.
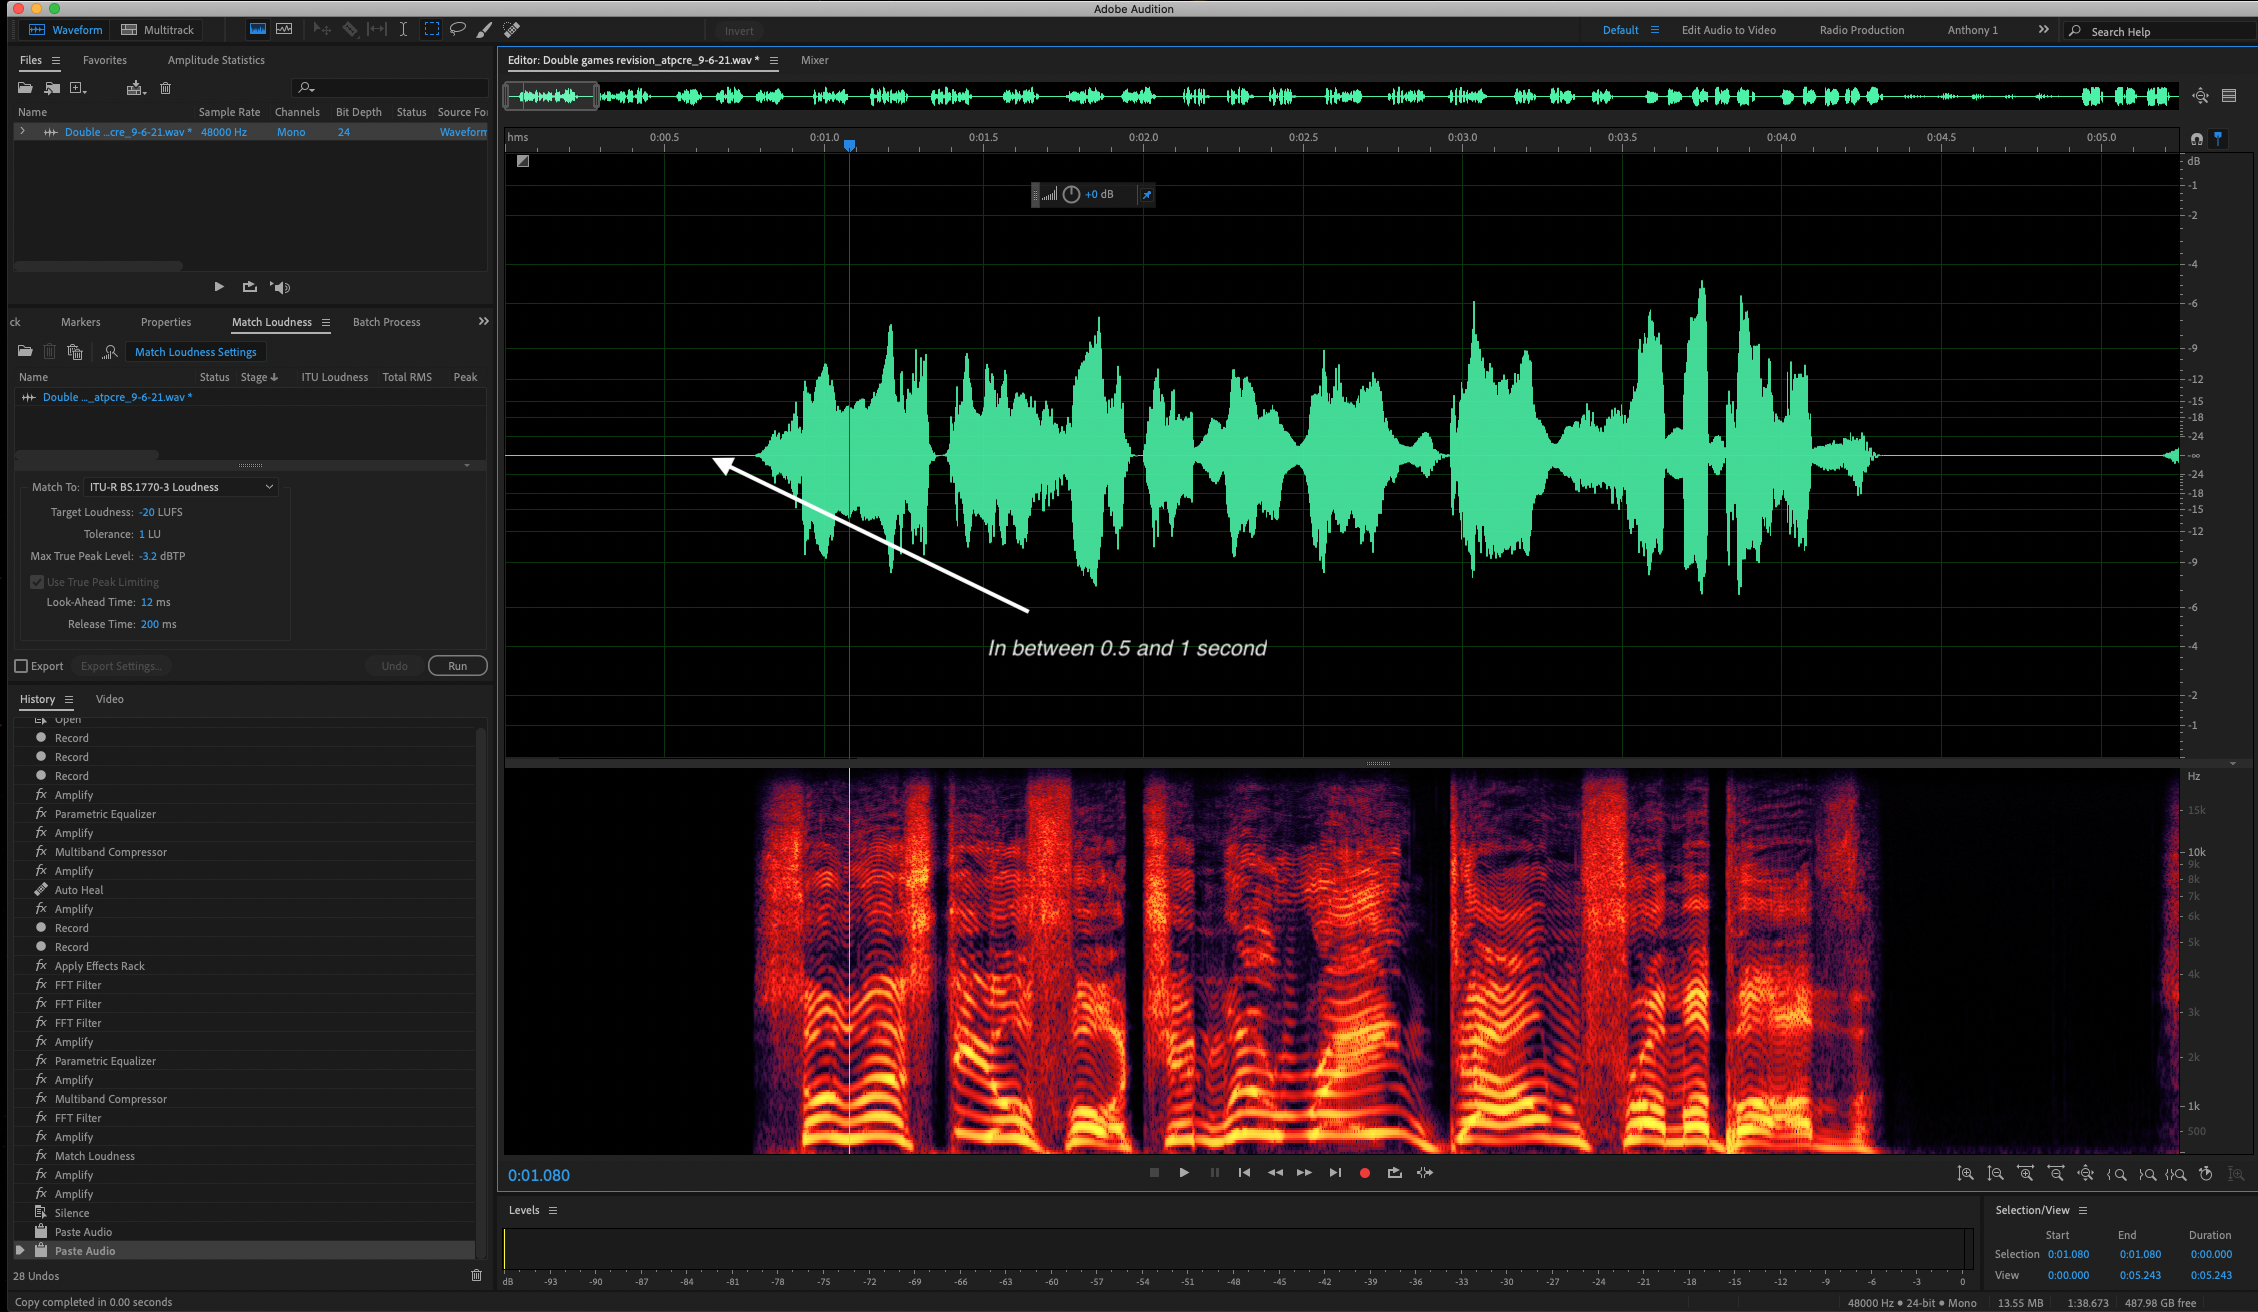
Step 10: Add Space To The Front And Back Of The File
ACX requires 0.5 seconds to 1 second of dead space before the audio begins and 1 second to 5 seconds of dead space at the end of the file.
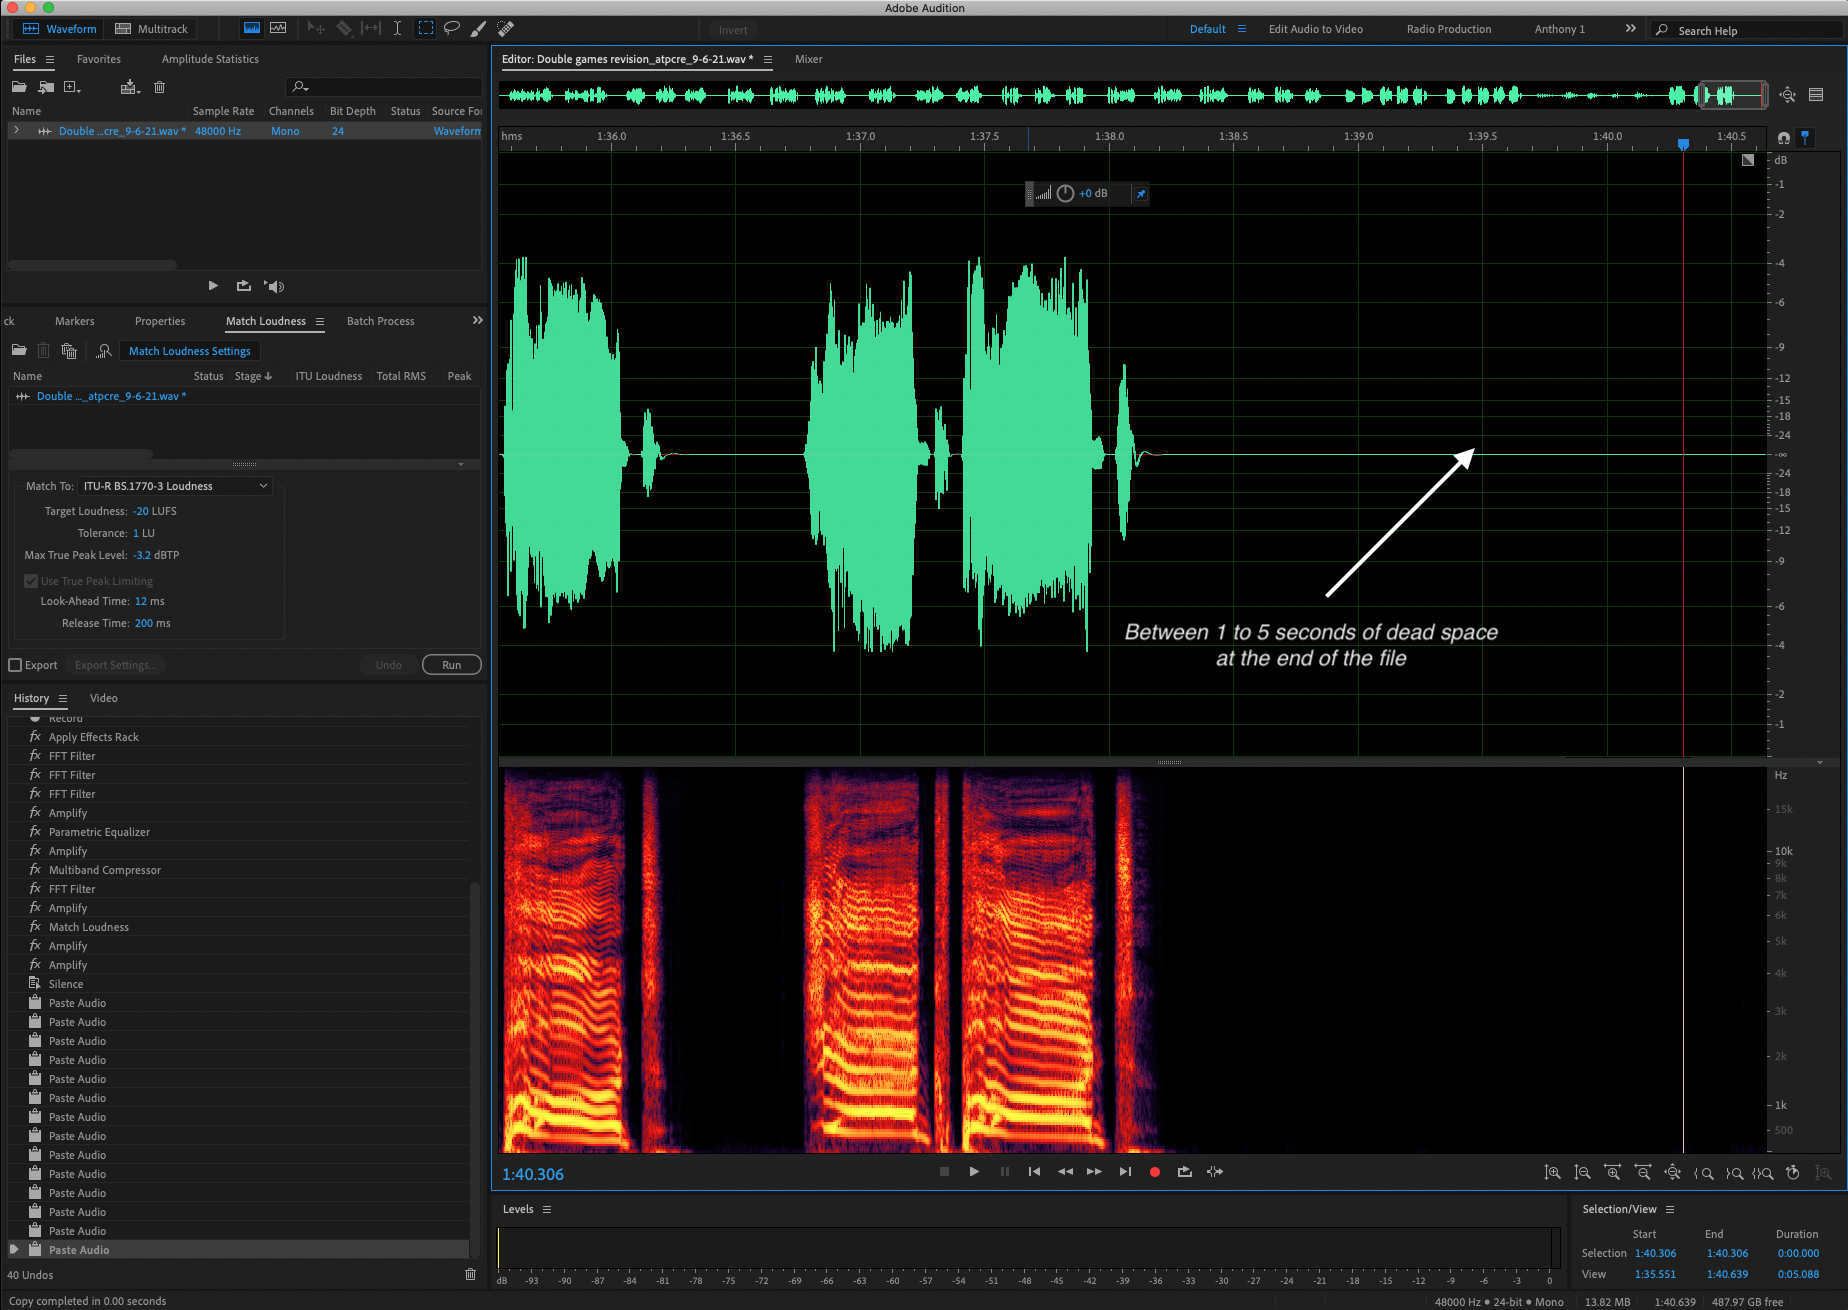
Your audio will not be accepted if you don't do this step. Below, you can see where I have made the file with the front and back times between the correct ACX settings.
And here is the back of the file:
Once you have made these adjustments to your audio file, you are ready for the last step.
Step 11: Save Your Audio To The Correct Settings
In this picture, I show you exactly the settings you need for ACX. I will also list them here:
- 44100 hz mono
- 16 bit
- MP3
- Constant Bit 192 kbps
- Title should be the chapter name, or opening and closing credits (Also include retail sample which is 1 - 5 minutes of the first chapter)
These are the settings you will need to correctly save your file for ACX and get past quality control each time.
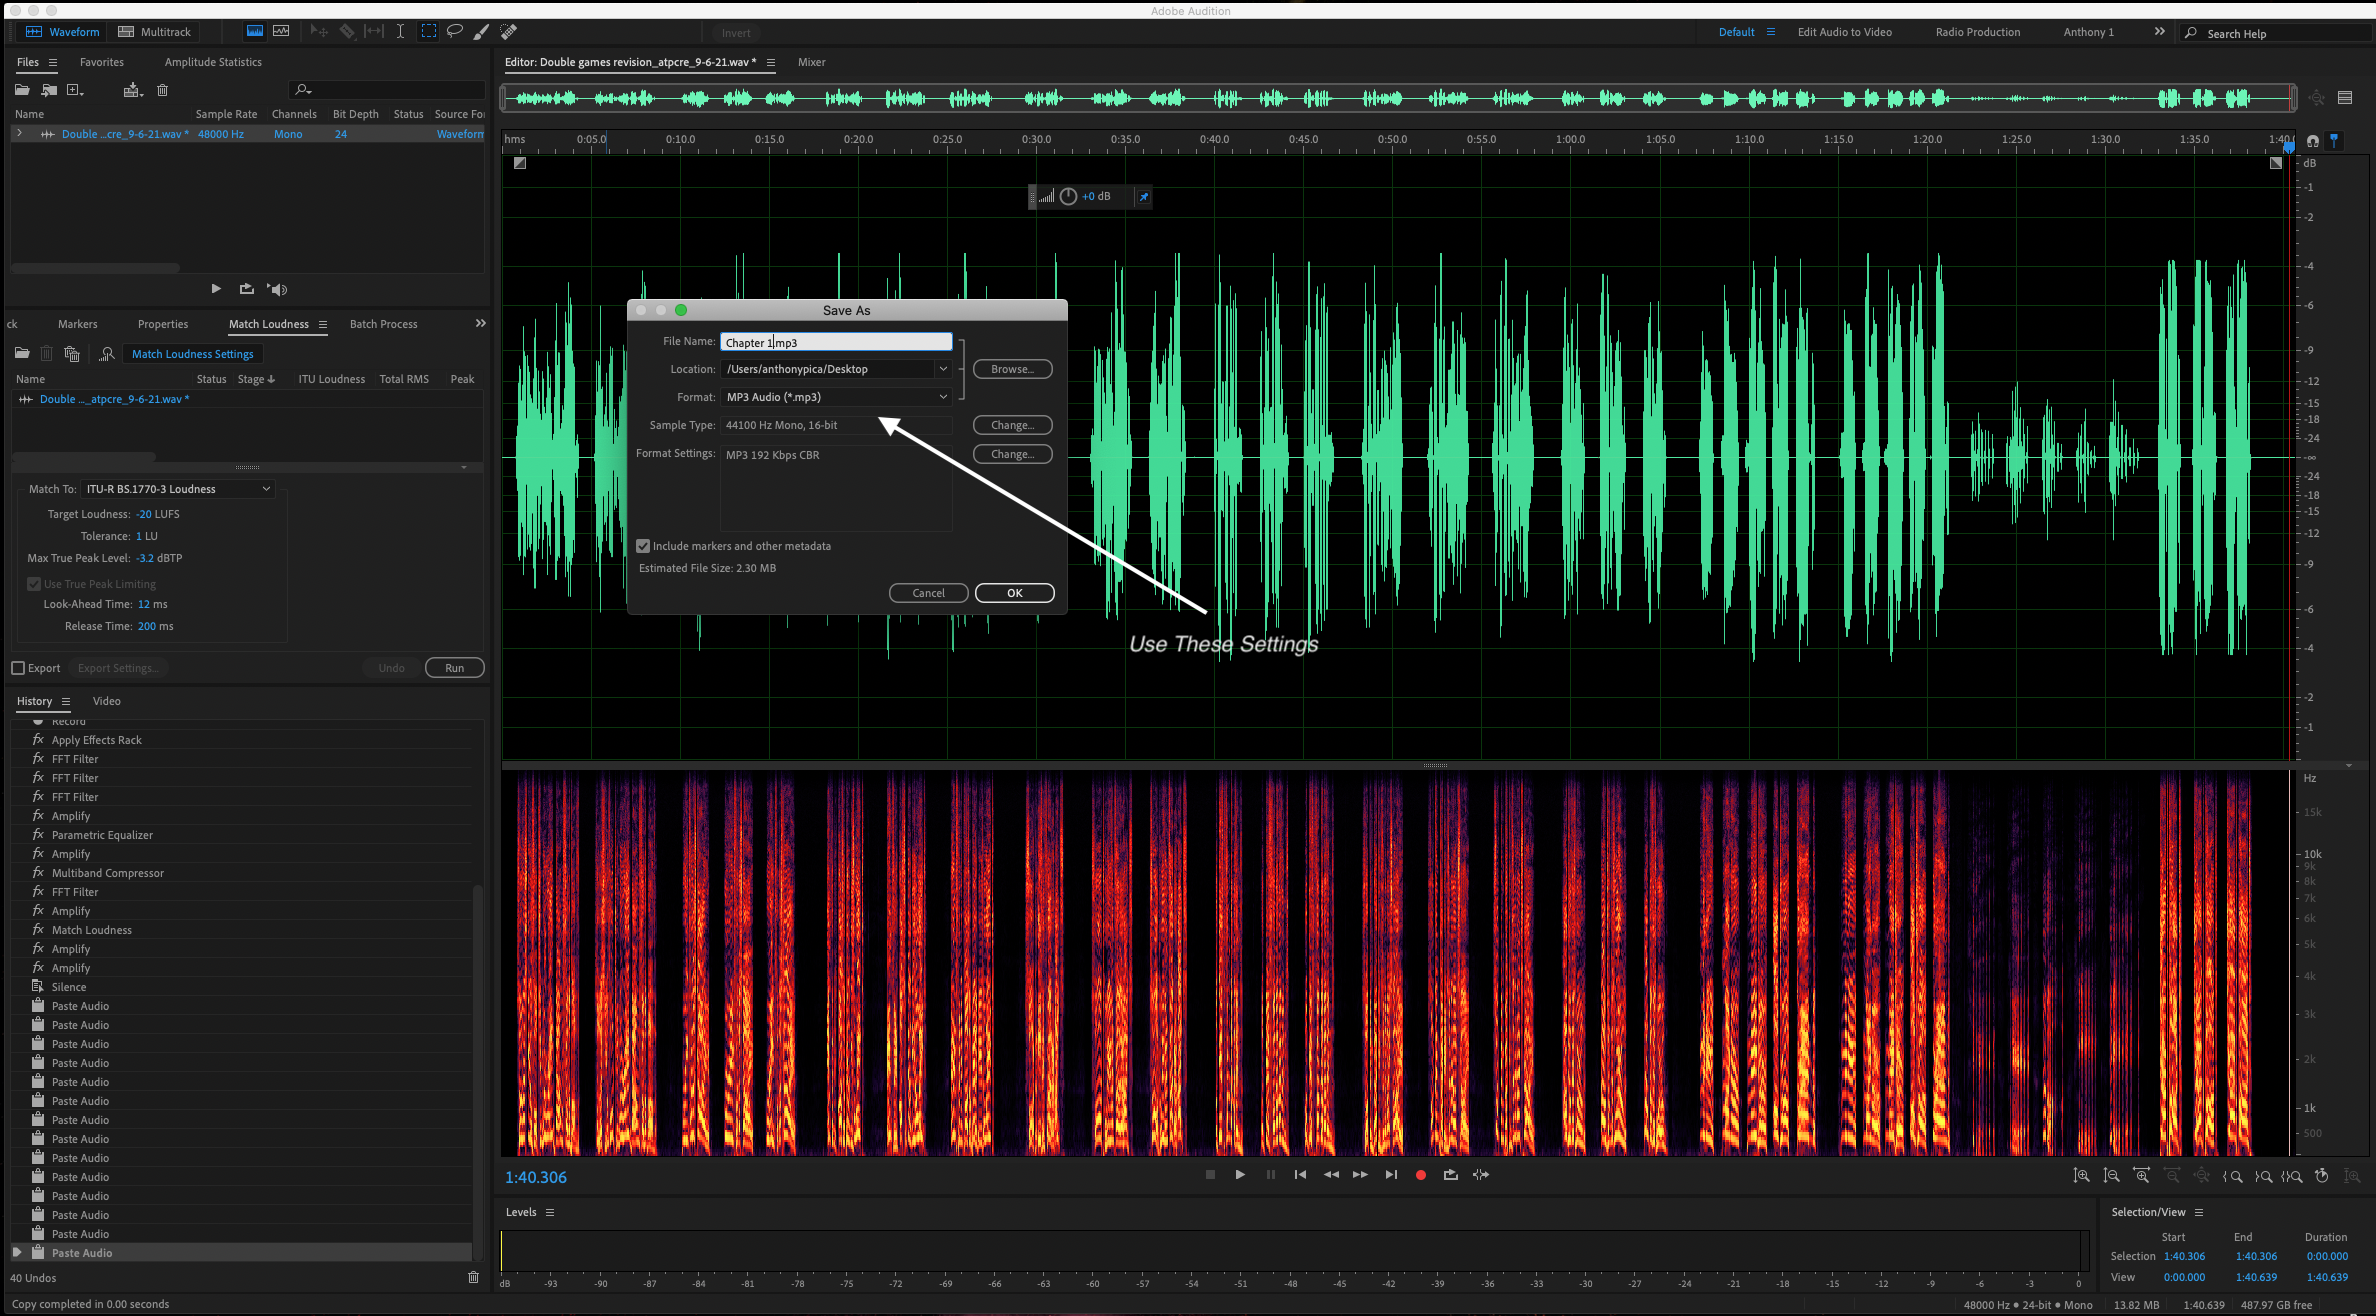
After you have clicked the "Save As" tab and put these settings in, hit Okay. You are now ready to submit this file to ACX.
Please remember that each chapter, introduction, opening, closing, etc. but be different files. So you must do this process for each file you upload.
Doesn't This Take A Lot Of Time?
The answer is ... yes, it takes A LOT OF TIME!
But, many people find editors and engineers to help them as they become busier and more successful so they can have someone else do it.
I have always been a firm believe that you must learn how to do it first before you have someone else do, so at least you know when they have done it wrong.
Also, when you are starting, the profit margin of your audiobooks and time will be so small, that paying someone extra money is probably not the best idea.
However, I leave that decision to you.
If you would like to learn more about ACX and formatting your audiobooks, check out my course here on ACX.
Addon Info:
Plugins:
Plugins, my friends, are the secret weapon for editing your voice-over work for ACX with speed and precision.
When you're working in the voice-over game, time is of the essence. And these little digital helpers allow you to automate certain tasks, saving you hours of tedious editing. For example, with a noise reduction plugin, you can say goodbye to unwanted background noise in your recordings.
Or, use a compressor plugin to adjust the volume levels of your audio, and make sure it meets ACX's technical requirements.
But the benefits of plugins don't stop there, oh no. They also help you achieve that professional-quality sound that's so important in the voice-over industry.
With advanced features and customizable settings, you can fine-tune the sound of your recordings to perfection. Need to fix vocal errors?
No problem, just use a de-esser, EQ and pitch correction. By using the right plugins, you can ensure that your voice-over recordings are of the highest quality, and meet ACX's strict standards.
Trust me, these plugins will take your voice-over work to the next level.
Thank you for reading :)
Sincerely,
Anthony


